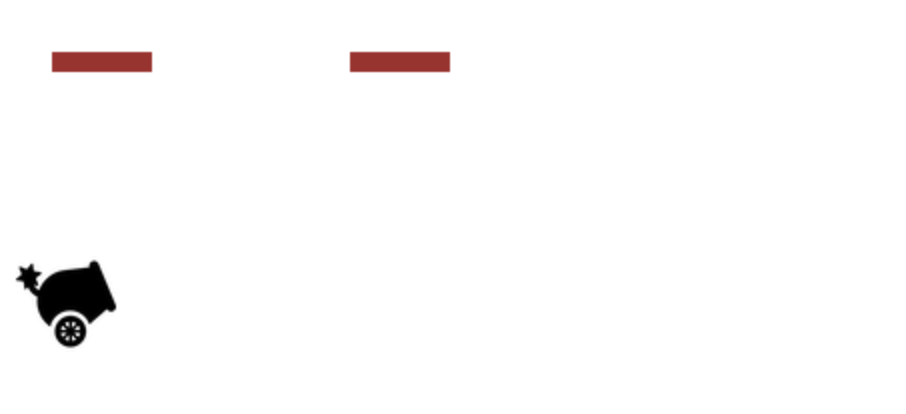
1. 준비하기
CSS와 Javascript에 연결하기
<link href="style.css" rel="stylesheet">
<script scr="main.js"></script>
HTML: <canvas> 태그
<canvas id="canvas"></canvas>canvas는 width와 height속성을 사용할 수 있는 요소로 드로잉 영역을 생성한다.
간단한 게임을 만들 때 게임이 작동하는 공간으로 사용된다.
HTML에 요소를 만들었으니 자바스크립트에도 연결해주어야 한다
var canvas = document.getElementById("canvas");<canvas>는 처음에 비어있는 도화지와 같다. 그림을 그릴 연필과 크레파스(도구)를 같이 불러와야 한다
.getContext('2d'); 메소드를 통해 2차원 랜더링의 함수(도구)에 접근할 수 있다
var ctx = canvas.getContext('2d');캔버스의 크기를 정해준다
canvas.width=window.innerWidth - 100;
canvas.height=window.innerHeight -100;
CSS는 각 크기를 100%로 설정해주어 다양한 환경에서 체크할 수도 있다(참고)
html{
    width: 100%;
    height: 100%;
}
body{
    width: 100%;
    height: 100%;
}
canvas{
    width: 100%;
    height: 100%;
}
*유튜버 Interactive Developer, 화면에 튀기는 공 만들기
2. 드로잉
Hitbox: 이미지를 넣기 전, 원과 네모로 히트박스를 만들어 작동해본다
드로잉은 당연히 도구를 이용해야한다
.getContext('2d')로 불러온 ctx를 이용한다
ctx.fillStyle = 'black'; //색깔은 검정
ctx.fillRect(20,20,100,100); //Rect = 사각형| .getContext의 함수 | |||
| 색 정하기 | fillStyle = 'color'; | name, rgb(), #HEX | |
| 사각형 그리기 | 테두리만 존재 | .strokeRect(x,y,width,height) | x,y = 좌표 width, height = 크기 |
| 채워진 사각형 | .fillRect(x,y,width,height) | ||
| 사각형 지우기 | .clearRect(x,y,width,height) | ||
| 패스로 그리기 | 패스 열기 | .beginPath(); | 형식 ctx.beginPath(); |
| 패스 시작점 | .moveTo(x, y); | ||
| 연결하기 | .lineTo(x,y); | ||
| 채우기 | .fill(); | ||
*Java의 경우 stroke → draw이다
등장 캐릭터를 오브젝트로 생성한다
사각형을 만들어도 그것이 특정 object와 연결되어있지 않으면 소용없다
오브젝트 안, 좌표와 크기를 설정할 수 있다
draw()함수를 통해 오브젝트 내부 드로잉이 가능하다
객체.draw();로 출력할 수 있다
var cannon = {
	x : 10,
    y : 200,
    width : 50,
    height : 50,

    draw(){
    ctx.fillStyle = 'green';
    ctx.fillRect(this.x,this.y,this.width,this.height);
    }
}

cannon.draw();
//객체를 외부로 출력
장애물, 적은 클래스로 만들어준다
Java의 클래스 생성과 같다. constructor(생성자)도 만들어서
초기값을 정해줄 수 있다(좌표 등)
클래스로 생성했기 때문에 클래스를 import 해주어야 호출할 수 있다(java개념)
class Wall(){
	constructor(){
    	this.x = 300;
        this.y = 300;
    }

    draw(){
    	ctx.fillStyle = 'black';
        ctx.fillRect(this.x,this.y,this.width,this.height);
    }
}

var wall = new Wall();
//import 시키기

wall.draw();
3. 애니메이션
애니메이션은 프레임마다 계속 그려주는 것이다
객체를 이동시켜야 한다. 1초 안에 몇 프레임으로 움직이는가 설정해줘야한다
requestAnimationFrame()은 그것을 가능하게 한다
var animation; //나중에 중단을 위해 변수화한다
function FrameMove(){
 //이 안에 호출된 함수를 다시 넣는다
	animation = requestAnimationFrame(FrameMove)

  	cannon.draw();
    //cannon은 1초에 60번씩 생성된다

    cannon.x ++;
    //cannon이 늘어나는 것을 확인할 수 있다
}
FrameMove();
그러나 움직인다는 느낌이 들지 않는다. 계속 그림을 초기화 해줘야 한다
function FrameMove(){
	ctx.clearRect(0,0,canvas.width,canvas.height);
    animation = requestAnimationFrame(FrameMove)
  	cannon.draw();
    cannon.x ++;

}
FrameMove();
타이머를 활용해 방해물을 만들어보자
타이머 변수를 만들고 나머지 연산을 활용하여
특정 시간마다 오브젝트를 생성할 수 있다
timer기준으로 함수 내부에서 wall을 호출한다
배열명.push();를 통해 배열에 집어넣는다
그 배열을 forEach( (a)>={ } )반복문으로 다룬다
//타이머 변수를 외부에 설정
var timer = 0;
//생성된 장애물들을 배열을 통해 관리한다
var walls = [];

function FrameMove(){
        ctx.clearRect(0,0,canvas.width,canvas.height);
        requestAnimationFrame(FrameMove);
        timer ++;

        if(timer % 150 === 0){
            var wall = new Wall();
            walls.push(wall);
        }

        walls.forEach((a)=>{
            a.x--;
            //각 벽이 왼쪽으로 움직임
            a.draw();
        })
        cannon.draw();
}
FrameMove();
생성된 방해물은 특정조건을 만족할 때 배열에서 제거한다
배열을 다루므로 walls에 접근하고 이미 forEach반복문으로 실행중이므로
forEach내부에서 조건문을 활용해 제거한다
제거하기 위해선 forEach에 두 개의 파라미터를 추가한다
var timer = 0;
var walls = [];
var animation;
function FrameMove(){
        ctx.clearRect(0,0,canvas.width,canvas.height);
        animation = requestAnimationFrame(FrameMove);
        timer ++;

        if(timer % 150 === 0){
            var wall = new Wall();
            walls.push(wall);
        }
//forEach에 파라미터 추가
        walls.forEach((a, i, o)=>{
            if( a.x < 0 ){
            o.splice(i, 1);
            //지우는 코드, splice 사용
            }
            a.x--;
            a.draw();
        })
        cannon.draw();
}
FrameMove();
4. 이벤트 연결
직접 움직이고 싶다면 역시 이벤트이다
canvas에서 사용하지만 canvas.addEventListener로 이벤트를 추가하지 않는다
window.addEventListener로 이벤트를 걸어준다(혹은 document)
//먼저 캐논을 그려주고
cannon.draw();
//이벤트를 추가해준다
window.addEventListener('keydown',CannonMove);

//좌, 우 방향키를 눌렀을 때 이벤트
function CannonMove(e){
    if(e.key == 'ArrowLeft'){
        ctx.clearRect(0,0,canvas.width,canvas.height);
        cannon.x -=5;
        cannon.draw();
    }

    if(e.key == 'ArrowRight'){
        ctx.clearRect(0,0,canvas.width,canvas.height);
        cannon.x +=5;
        cannon.draw();
    }
}
하지만 게임은 requestAnimationFrame이 실행되는 곳에서 보여져야한다
위와 같이 단순히 이벤트를 만들어봤자 한 프레임 구간에서만
캐논이 그려질 뿐이다. 아래는 단순 동작일 때의 연결이다
//window에서 이벤트추가
window.addEventListener('keydown',CannonMove);
//draw부분을 빼고 값만 수정해준다
function CannonMove(e){
    if(e.key == 'ArrowLeft'){
        cannon.x -= 5;
    }
    if(e.key == 'ArrowRight'){
        cannon.x += 5;
    }
}
이벤트가 연속 동작일 때: 특정 변수를 매개체로 사용한다
예를 들면 점프같은 동작은 연속동작이다
하지만 requestAnimationFrame()가 사용되는 함수 안에서
이벤트의 사용을 반복하는 것은 좋지 않다
var jump = false;
//window와 document모두 사용 가능하다
window.addEventListener('keypress', function(e){
    if(e.code === 'KeyX'){
        jump = true;
    }
})

//requestAnimationFrame(); 을 사용하는 함수 내부
function FrameMove(){
        ctx.clearRect(0,0,canvas.width,canvas.height);
        animation = requestAnimationFrame(FrameMove);
        timer ++;
//jump변수가 true로 바뀔 때 y값이 움직인다
        if(jump == true){
            cannon.y --;
        }

}
함수 안 타이머를 넣어 동작을 제어한다
위와 같이 만들면 무한히 점프한다
다시 돌아오게끔 만든다
//점프를 제어할 점프타이머를 만들었다
var jump_timer = 0;
function FrameMove(){
        ctx.clearRect(0,0,canvas.width,canvas.height);
        animation = requestAnimationFrame(FrameMove);
        timer ++;
//점프가 켜지면, 점프타이머도 증가
        if(jump == true){
            cannon.y --;
            jump_timer ++;
        }
//타이머가 50이상일 때 점프를 끄고 타이머 초기화
        if(jump_timer>50){
            jump=false;
            jump_timer=0;
        }
//타이머에 상관없이 대포는 y 200까지 이동
        if(jump == false){
            if(cannon.y<=200){
                cannon.y ++;
            }
        }
5. 충돌
Collision check: 둘이 부딪힐 때 메소드가 실행된다
부딪힌다는 것은 좌표가 겹친다는 것이다
즉 좌표값의 차이를 계산해주어 함수에서 판별한다
function Collision_detection(cannon,wall){
   var x_differ = wall.x - (cannon.x + cannon.width);
   var y_differ = (wall.y + wall.height) - cannon.y;
   if(x_differ<=0 && y_differ<=0){
   ctx.clearRect(0,0,canvas.width,canvas.height);
   cancelAnimationFrame(animation);
   }
}

function FrameMove(){
        ctx.clearRect(0,0,canvas.width,canvas.height);
        animation = requestAnimationFrame(FrameMove);
        timer ++;
//중간 내용 생략//
        walls.forEach((a, i, o)=>{
            if(a.x<0){
            o.splice(i,1);}
            a.x--;
      //모든 장애물과의 충돌이므로 forEach내부에 넣는다
            Collision_detection(cannon,a);
            a.draw();
        })
        cannon.draw();
}
*다양한 상황에서 충돌을 잡아낼 수 있도록 잘 변형한다
6. 이미지 넣기
이미지를 연결하기 위해 변수에 이미지를 담는다
var img_cannon = new Image();
img_cannon.src = 'cannon.png';
지금까지 ctx는 draw()함수 내부에 사용했고
ctx.fillStyle이나 ctx.fillRect 등으로 사용했다
하지만 나아가 ctx를 통해 이미지를 불러올 수 있다
또한 이미지 좌표를 입력해줘야 하는 것을 주의한다
var cannon = {
	x : 10,
    y : 200,
    width : 50,
    height : 50,

    draw(){
    ctx.fillStyle = 'green';
    ctx.fillRect(this.x,this.y,this.width,this.height);
   //이미지 삽입
   	ctx.drawImage(img_cannon,this.x,this.y);
    }
}
*초록 배경을 지우지 않은 모습
var cannon = {
	x : 10,
    y : 200,
    width : 50,
    height : 50,
    draw(){
    ctx.drawImage(img_cannon,this.x,this.y);
    }
}
'Study > Javascript' 카테고리의 다른 글
| Javascript_09: canvas에서 텍스트(글자) 사용하기, 텍스트 가운데정렬 (0) | 2021.10.04 |
|---|---|
| Javascript: canvas 환경 세팅 (0) | 2021.09.28 |
| Javascript_08-3: 스크롤(scroll) 이벤트의 활용 (0) | 2021.09.26 |
| Javascript_08-2: 마우스이벤트, 키보드 이벤트 (0) | 2021.09.26 |
| Javascript_08: 이벤트(event) (0) | 2021.09.24 |